I made 2 cards in Fall color fabrics. Cute!! Check out this tutorial
http://craftapple.wordpress.com/2006/08/23/quilted-cards-tutorial/#comment-24936
Daisy Project #2
Part 4
Review of mitered corner stitching
Sew to the corner, lift needle, cut threads
Move the "dog ear" over
Start sewing from the corner (see instructions below)
- As shown above, just to make sure the mitered corners work out well, by way of review - note that when sewing the seam AFTER you've basted it, sew only to the corner and STOP - raising the needle and cutting the threads. .
- Then move the "dog ear" over, and put the needle down into the fabric at the point where it is just beyond the "dog ear" multi-layer area. (as shown in the picture above)
- Go ahead and sew that seam doing the same thing when you come to the next corner.
- REMEMBER TO LEAVE THE UNSTITCHED AREA AND TWO BINDING TAILS AS INSTRUCTED IN PART 3.
- ALSO, FOR THE HANDLE AREA - LEAVE BOTH HANDLE AREA ENDS TO BE COMPLETED LATER WITH BINDING. (You can set aside the handle section piece after you've finished the binding around all edges EXCEPT the cut-out handle portion)
After basting and sewing the binding on the flap section piece, you should now have the open area and the 2 binding tails that look something like the picture above.
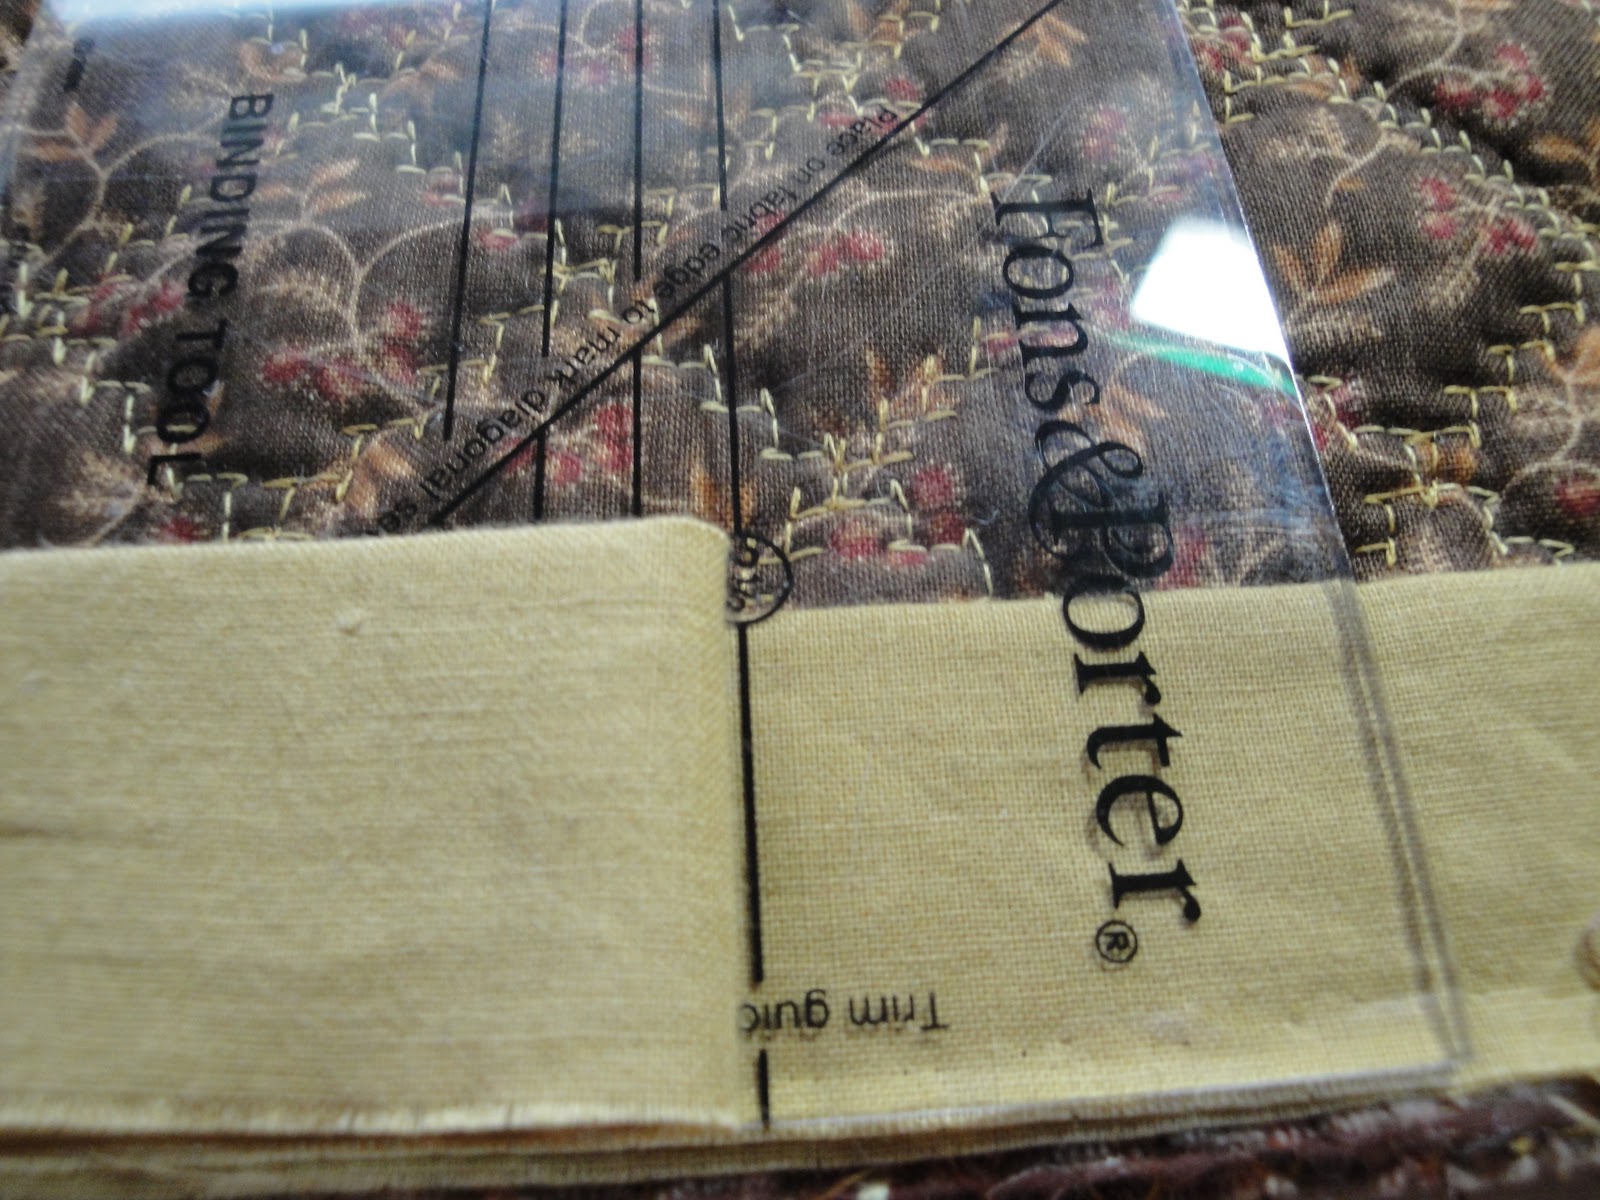
To finish off binding on any project, including quilts or table toppers, or wall hangings, the above tool is a handy dandy tool to have. It is worth every cent I paid for it. I think I bought it from JoAnn's using one of their 50% off coupons. If you do not yet receive JoAnn flyers through the mail, I strongly recommend you sign up for them the next time you are in the store. The coupons really help when trying to build your repertoire of notions and tools.

- If you remember in Part 3, we mentioned that you needed to leave a 10 to 12 inch section of the binding un-sewed (leaving the 2 binding tails for working with later).
- Lay out your flap section like the picture above.
- First we will be working with the RIGHT binding piece.
- Lay the right binding piece along the edge of the flap section as shown above.
- Using a tape measure, measure the open un-sewed area to find the CENTER.
- You will CUT the right binding tail at the CENTER of the open un-sewed space so that it ends at the center of the opening.
Next, you will lay the binding tool over the RIGHT binding tail. Pay special attention that the arrow in pointed to the right and looks like the picture above.
Now, lay the LEFT binding tail OVER the binding tool and fold-back the strip AT the 2 1/2 inch line (because our strips were 2 1/2 inches wide)
Cut the LEFT binding strip at the fold as shown above.
The next segment is tricky... Open out left binding strip so right side is facing UP. Open out right binding strip and place RIGHT SIDES together with the left binding strip. Position end of right strip along top edge of left strip. NOTICE: BINDING PIECES WILL BE RIGHT SIDES TOGETHER AND AT A RIGHT ANGLE TO EACH OTHER.
- Looking at the picture above, lay the binding tool along the pinned edge so that the corner point of the binding tool at the lower left (see picture) is at the point where the two binding strips start to overlap.
- Line up the diagonal line on the binding tool at the edge of the overlapped fabrics.
- Next, you will need your marking pen or chalk to mark a line along the lower edge of the binding tool.
Mark along the edge onto the fabric from corner to corner of the overlapping area as shown above.
NOTE: I LIKE TO PIN ALONG THAT LINE (NO PICTURE TO SHOW) AS A "FAKE" SEAM TO TEST TO MAKE SURE THAT THE FINAL BINDING RESULT WILL NOT BE TWISTED. IT IS VERY EASY TO MAKE A MISTAKE AND DISCOVER THAT THE BINDING IS TWISTED AFTER YOU'VE SEWN IT. THIS LITTLE "DOUBLE-CHECK" EFFORT MAY SAVE YOU GRIEF AS IT HAS ME SEVERAL TIMES.
After making sure everything is correct, sew the seam. You will find it will be a bit awkward and you will need to stop (with the needle down into the fabric) periodically throughout while sewing this seam to make sure everything is lined up accurately and not pulling off in one direction or the other. The point is to sew from point to point along that line IN A STRAIGHT LINE.
Trim away the outer triangle of fabric leaving about a quarter inch seam. Press the seam open with your iron.
When you are done with those steps, it should look like this (see above) Presto!! It is exactly the right length.
Pin your seam and sew this final length of binding to the flap piece. You will probably need to trim around the edge to make everything straight and square. Now you are ready to hand-stitch the binding by folding it over and using a "hem stitch" to hide all of the outer seam allowances. Good hand work can be done in the evening while watching TV : )