Daisy Project #2
Insulated Food Carrier
Part 3
Quilting instructions and attaching binding to both the handle section and the flap section will be covered in Part 3. (Quilting the food carrier is optional. I prefer to quilt the fabric "sandwich" together)
IMPORTANT NOTE: WHEN WORKING TO QUILT THE HANDLE SECTION OF YOUR FOOD CARRIER YOU WILL NOT QUILT ALL OF THE FABRIC !! PLEASE NOTE THAT THE FINISHED SECTION WILL LOOK LIKE THIS: YOU WILL NEED TO MEASURE ONE INCH DOWN FROM THE CUT-OUT SECTION AND QUILT ACROSS IN A STRAIGHT LINE. (Use your ruler to mark the line with chalk) Then for the remainder of the quilting, you will use the instructions below:

To begin quilting both pieces of fabric, using an Omnigrid ruler, find the 45 degree angle line. In this picture, you will see that it is traveling from the lower left quadrant of the picture upwards through the picture to the upper right quadrant.

Now, you will line up that 45 degree line with the edge of the fabric "sandwich".

Using a chalk marker, or other marker of your choice (you will need to be able to remove the lines later. Chalk is my favorite because it dusts off easily with a damp cloth) mark the line that is created along the edge of the ruler.

This makes your first 45 degree line. You will use this line to mark additional lines all across both the handle section and the flap section of the insulated food carrier.

Next, you will line up the chalk line with the 1 inch line on the ruler. Just continue doing this for all the lines. across both pieces.

- After finishing lines going in the same direction, I recommend that you go ahead and quilt the lines on the sewing machine. I like to use a decorative stitch on my machine.
- When you complete both pieces with quilting, you will go ahead and do the same thing using your marker to make marks going in the alternate direction at 45 degrees. Then follow by quilting those lines, as well.

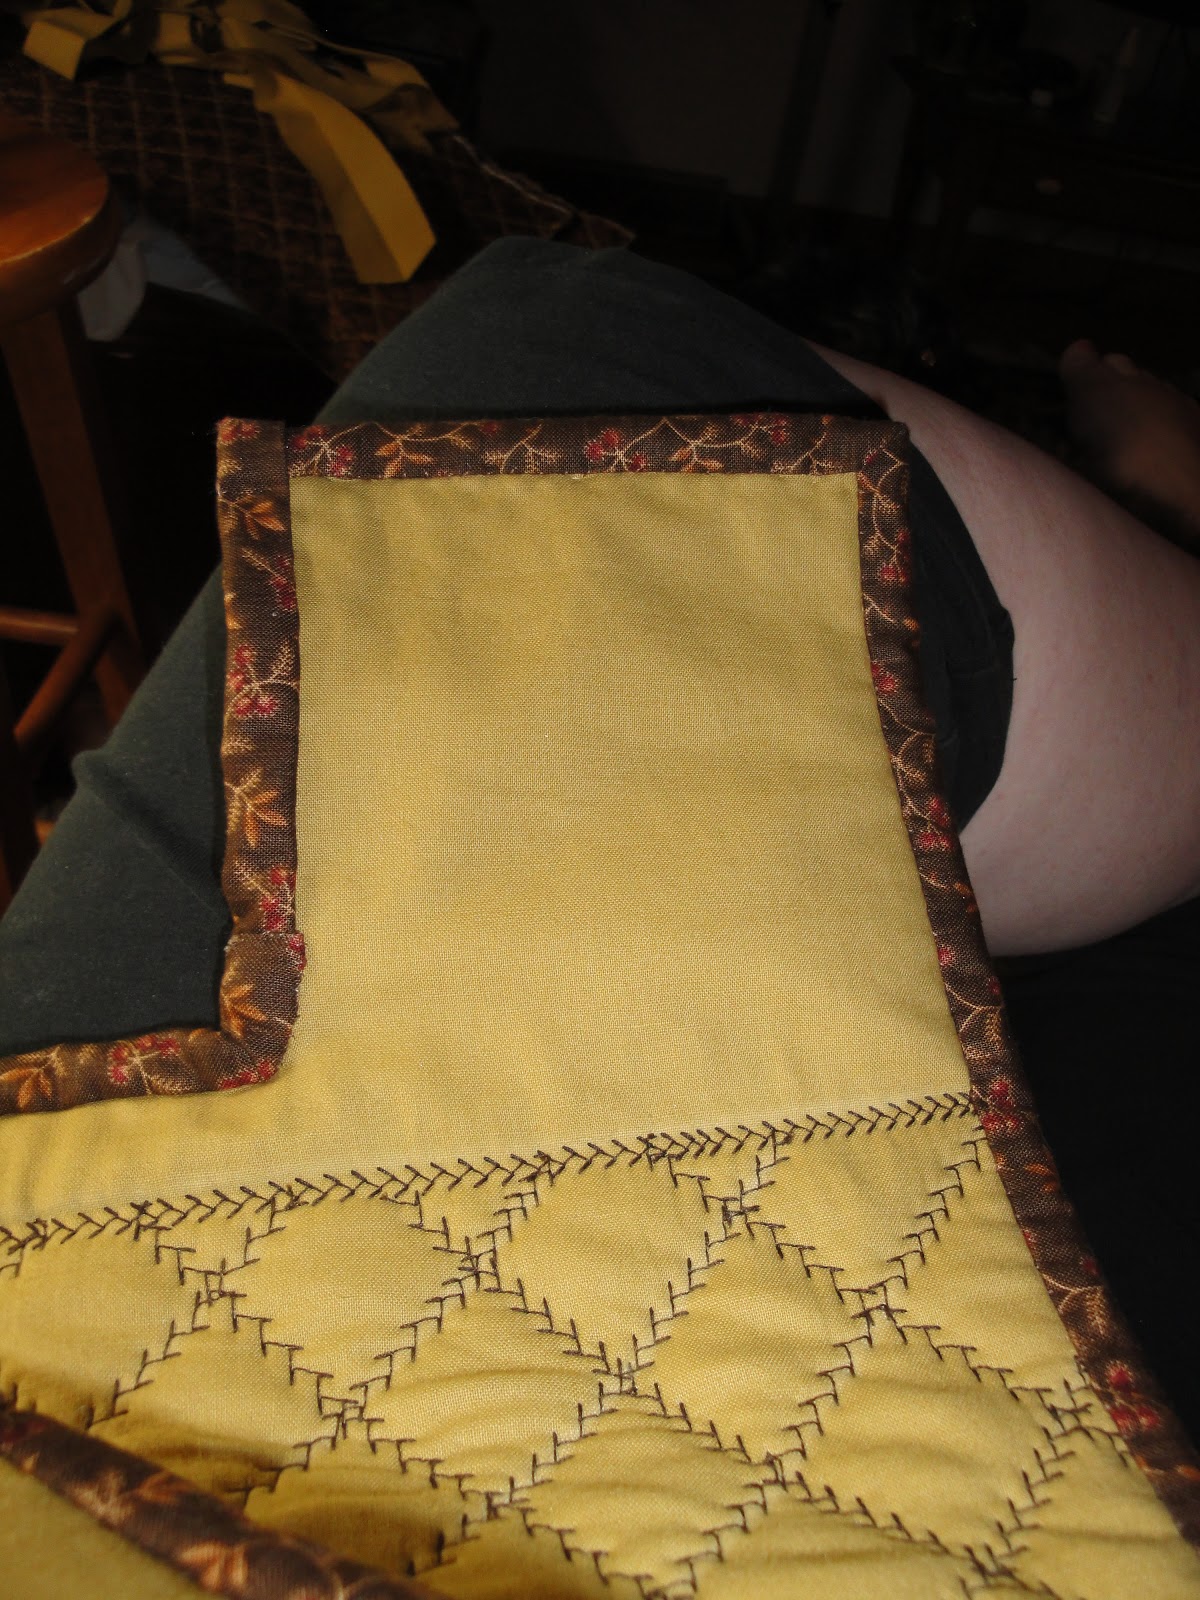
- When you are done, it will look something like this. (See above) After you finish all of the quilting for both pieces you may need a coffee break! Our next step will be to add binding to both portions of the insulated food carrier. You will need to get your binding pieces that you made in Part 2 of this project.

Handle section piece:
- First, at the top area of the handle section, you will lay the folded binding onto your handle section as is shown above. We will be attaching the binding to all of the outer edges EXCEPT the inner handle cut-out area. That will require a different process due to needing to make a pocket for the dowels to be placed into.

Pin the binding with the raw edge matched to the raw edge on the piece we are working with. Take care to make sure that you start at the cut-out handle area. (See above picture)

Next, you will use a needle and thread and baste the binding to the handle section piece. Stop your basting at the corner.

This picture above shows what we are aiming for when we miter corners. Now for the instructions for the corner....

This is how we begin. Remember, you basted to the corner... Now, lay the binding upwards away from your handle section piece. This will START your miter.

- Now, hold that in place and turn down the binding back lined up with the other edge (left side above). You can see that little "dog ear" that is created.
- Now, you will use your needle, make a stitch downward through the handle section near the corner (upper edge) and bring the needle up carefully just a bit over from that "dog ear" and continue to baste the binding along the left side edge.
- You will continue to baste all the way down to the other corner. Then, treat the other corner the same way to make another miter prep (dog ear).
- When you come to the edge of the "cut-out handle" area. You will tie off your thread and knot your basting by taking a couple of stitches in the same spot.
- Then, cut off the binding strip at the edge of the "cut-out handle" area. Next do the same thing for the other side of the handle section piece.
BINDING FOR THE FLAP SECTION PIECE:
When beginning to pin the binding for the flap section piece, leave a 7 to 8 inch tail of binding free when you begin pinning/basting the binding to the flap piece. See picture below:

- Continue pinning/basting around the piece. When you have basted around the quilt and are approaching the beginning point, STOP!
- Leave a space of 10 to 12 inches between the binding beginning and binding ending. You will have TWO tails of binding hanging from that opening area.
- When we are ready for the final step in Part 4 - we will show you how to finish off the binding.
THE CUT-OUT HANDLE AREA WILL BE DONE IN PART 4 OF OUR BLOG PROJECT #2, AS WELL AS THE FINISHING OF THE BINDING ON THE FLAP SECTION . THE HANDLE CUT-OUT AREA REQUIRES SPECIAL TREATMENT DUE TO NEEDING TO INCLUDE A SPECIAL POCKET FOR THE WOODEN DOWELS. Stay tuned for Part 4 soon!
No comments:
Post a Comment